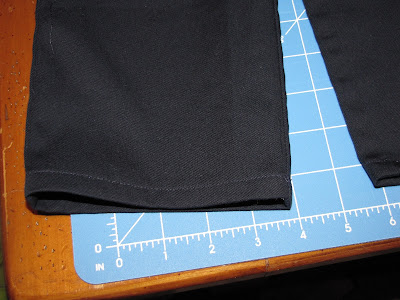
First measure.....
When calculating how much extra length you need for the hem, you first have to decide the size of the hem. For example, many jeans usually have a 1/2inch hem (as do the pants in this tutorial). Other pants might have a much broader hem, like 1 inch. If you are doing a 1 inch hem, you will need about 1 1/4 to 1/2 inches of extra fabric. This will allow you to have 1/4 to 1/2 inch to fold under and then a 1 inch hem.
**Important to note: Make sure you are trying your pants on with the shoes you are anticipating wearing with them. When hemming for heels, you would obviously hem them longer than if you were hemming for flats or sneakers. Do not try them on with bare feet. You will most certainly be upset when they look too short with all of your shoes!
Now Iron....
This pair above, I am only taking off 1 inch. As you can see from the photo, there would not be enough excess fabric if I cut the original hem from the pants to fold under and make a 1/2 inch hem, so I had to stitch rip the original hem to unfold. You will see what I mean in the next pic.
**Make sure that you leave your iron on the pants for a good amount of time to get a really good crease. This will make it easier when you pin.
Now is your time to cut. Measure from the crease you made (the finished length) and add the size of your hem + 1/2 inch. Just enough to fold under. You can see in the picture below my two creases and the little bit of fabric I left. That is going to get folded inside the new hem so your pants don't have any raw edges exposed.
Fold on your new fold lines and pin. Many sewers use a ton of pins in their work. Not me. I use enough to hold it there while moving the pants to the machine, but I don't go too crazy. Quite frankly, I am a little lazy;)
Now you're ready to sew.
If you look closely at the pic above, I line the inner edge of the fold against the inside line of the left side of my presser foot (If that makes any sense:). This will allow your stitch to be right at the edge of your fold. In this case, the outside of the hem is also even with the edge of the presser foot, but this won't always happen. If you are doing a hem wider than 1/2 inch, it won't line up so perfectly.
That's it....Just start at one of the side seams and sew around being careful to watch that fold line and the inside of your presser foot. This will help with sewing a very straight line. Back stitch a couple of times in the beginning and then again in the end. But not too much. You don't want your backstitch to look "messy" on the front side of your pants.
**If you are new to sewing, GO SLOW. Take your time. The faster your needle goes, the harder it is to guide the fabric in a straight line.
Your hem will be even and perfect and look exactly the same as when you purchased the pants. Just shorter!
Perfect right??
Good luck.


No comments:
Post a Comment